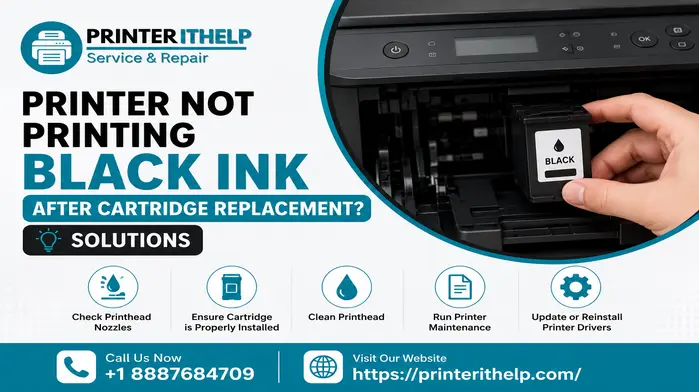
There's nothing more frustrating than discovering that your HP printer's ink cartridges aren't working when you're about to print something important. You might see blank pages, faded prints, or even an alert that the printer can't recognize the cartridge. This problem can occur suddenly—even with new ink cartridges—and leave you wondering what went wrong.
If your HP printer not printing error keeps appearing, the problem may not always be the printer itself. It could be due to dirty contacts, outdated firmware, or a small setup mistake. Luckily, you can fix most HP ink cartridge problems in just a few minutes with a few smart troubleshooting steps.
This blog guide will help you understand why your HP printer's ink cartridges aren't working and how to fix them quickly—without wasting ink, paper, or your time.
Common Reasons Why HP Printer Ink Cartridges Stop Working
Before we move on to solving these problems, it's important to understand the root causes. The most common reasons why your HP ink cartridges might not be working are:
1. Protective Tape Still Attached
Every new HP cartridge comes with a thin piece of plastic or orange tape over the ink nozzles to prevent ink leakage. Forgetting to remove this before installation can result in the printer not receiving ink.
2. Dirty or Misaligned Contacts
Dust, ink residue, or fingerprints on the cartridge contacts can block the electrical connection between the cartridge and printer, leading to recognition errors.
3. Incorrect Cartridge Installation
Sometimes, cartridges aren’t seated properly inside the carriage, making the printer think they’re missing or damaged.
4. Firmware or Software Issues
If your HP printer recently updated its firmware, it may temporarily fail to recognize certain ink cartridges—especially third-party ones.
5. Empty or Dried-Up Ink
Even if you haven’t printed in weeks, ink can dry inside the cartridge or the printhead, blocking ink flow.
How to Fix HP Printer Ink Cartridges Not Working
Below are step-by-step steps to get your HP printer ink cartridge working again. These solutions apply to both original HP cartridges and compatible third-party cartridges.
1. Remove and Reinstall the Ink Cartridges
Start with the simplest fix—reinstall your ink cartridges.
Steps:
- Power on your HP printer.
- Open the top access door and wait for the carriage to move to the center.
- Gently remove the ink cartridges.
- Check for any visible ink leakage or dirt.
- Reinsert them firmly until you hear a click.
This helps re-establish a solid connection between the cartridge and the printer contacts.
2. Clean the Cartridge Contacts
Dirty or oxidized contacts are a common cause of your HP ink cartridge not working. Cleaning them carefully often resolves the problem.
You’ll need:
- A soft lint-free cloth or coffee filter
- Distilled water or isopropyl alcohol
Steps:
- Turn off the printer and unplug it.
- Remove the ink cartridges.
- Dampen the cloth with a few drops of distilled water.
- Gently clean the gold-colored contacts on both the cartridge and inside the printer.
- Let them dry completely before reinstalling.
Avoid touching the nozzles directly, as that can cause further clogging.
3. Reset the Printer
Resetting your HP printer clears temporary memory errors that can cause ink cartridge recognition issues.
Steps:
- Turn off your printer.
- Unplug it from the wall for 60 seconds.
- Plug it back in and power it on.
- Wait until it finishes initializing, then try printing a test page.
A simple reset can often refresh the printer’s communication with the cartridges.
4. Clean the Printhead
If you notice faded, streaked, or blank prints, the issue could be a clogged printhead.
Automatic method:
- Open Printer Settings → Tools → Clean Printhead (this may vary by model).
- Follow on-screen prompts to run the cleaning cycle.
- Print a test page.
Manual method:
- Remove the printhead (if detachable).
- Soak it in warm distilled water for 10–15 minutes.
- Let it dry completely before reinstalling.
This process clears dried ink from nozzles and restores print quality.
5. Check Cartridge Compatibility
If you recently replaced your ink, ensure it’s compatible with your printer model. HP printers often reject non-compatible cartridges.
Each HP printer has a list of supported cartridges on the inside panel or in the manual. Cross-check the model numbers before installing new ones.
If your hp printer ink not recognized error continues, try replacing with genuine HP cartridges to see if the issue resolves.
6. Update HP Printer Firmware
Firmware updates fix known bugs and improve performance - but they can sometimes also cause older cartridges to stop working.
Steps:
- Visit HP’s official support site.
- Enter your printer model.
- Download and install the latest firmware update.
After updating, restart your printer and reinstall the cartridges.
7. Disable HP Cartridge Protection (Optional)
Some HP printers have a “Cartridge Protection” feature that prevents the use of refilled or remanufactured cartridges.
To disable it:
- Open your printer’s Embedded Web Server (EWS) by entering its IP address in your browser.
- Go to Settings → HP Cartridge Protection.
- Turn the feature Off.
This allows the use of third-party or refilled cartridges if needed.
8. Run the HP Print and Scan Doctor
HP offers a free tool—HP Print and Scan Doctor—that can detect and fix cartridge recognition and printing issues automatically.
How to use it:
- Download from HP’s official site.
- Launch the program and select your printer.
- Let it scan for problems.
- Apply the recommended fixes.
It’s one of the quickest ways to resolve hp ink cartridge not working errors.
9. Replace HP Printer Ink Cartridges
If all else fails, you might be dealing with defective or dried-out cartridges.
Steps to replace:
- Open the access door.
- Remove the old cartridges.
- Unpack new HP ink cartridges and remove the protective tape.
- Insert them into their respective color slots.
- Close the lid and run a test print.
Always use genuine HP cartridges for best results. Non-OEM ones might be cheaper, but they can cause print quality issues or be rejected by the printer.
When replacing, ensure you follow your printer’s specific model instructions to avoid damage.
Troubleshooting via Printer Settings
If you still face errors, checking the printer settings can help.
For Windows users:
- Go to Control Panel → Devices and Printers.
- Right-click your HP printer and select Printer Properties.
- Under Maintenance or Tools, click Clean Cartridges or Align Printer.
For Mac users:
- Open System Settings → Printers & Scanners.
- Choose your HP printer.
- Click Options & Supplies → Utility → Open Printer Utility.
These built-in tools perform maintenance cycles that can restore normal printing.
If the issue persists after following these steps, refer to hp printer troubleshooting for advanced repair methods.
Tips to Prevent HP Ink Cartridge Problems
Prevention is always better than troubleshooting. Follow these expert tips to keep your ink cartridges working perfectly:
- Print at least once a week to prevent ink from drying.
- Store cartridges in a cool, dry place.
- Never leave the printer unused for long periods.
- Always use the “Turn Off” button instead of unplugging directly.
- Keep firmware and drivers updated regularly.
- Use genuine HP ink cartridges for optimal performance.
Following these simple steps can drastically reduce future cartridge errors.
When to Replace HP Printer Ink Cartridges
Even with perfect maintenance, ink cartridges have a limited lifespan. Replace them if:
- The printer shows “Low Ink” or “Empty Cartridge” alerts.
- Print quality remains poor after multiple cleaning cycles.
- The cartridge has been refilled several times and no longer holds ink efficiently.
Replacing old ink not only improves print quality but also extends the printer’s lifespan by preventing clogged printheads.
You can replace HP printer ink easily by following HP’s online instructions for your model.
HP Printer Not Online After Cartridge Change?
Sometimes after replacing a cartridge or resetting, the printer may appear disconnected or offline.
If your hp printer not online message appears, it’s usually due to communication issues between the printer and computer. Simply restart both devices, check the network connection, and re-run the setup wizard to bring it back online.
Final Thoughts
If your HP printer ink cartridges aren’t working, don’t panic—most issues are quick and easy to fix. Whether the problem is dirty contacts, incorrect installation, or outdated firmware, the solutions above will get your printer back up and running in no time.
Regular maintenance, genuine ink replacements, and timely updates will help you avoid these issues altogether. And if you ever run into persistent problems, PrinterITHelp.com offers step-by-step guides for every HP printer model to make troubleshooting easy and stress-free.
Frequently Asked Questions
1. Why is my HP printer not recognizing the ink cartridge?
Your HP printer may not recognize the ink cartridge due to dirty contacts, incompatible or refilled cartridges, or outdated firmware. Try cleaning the cartridge contacts and restarting the printer.
2. How do I fix HP printer ink cartridges not working?
Remove the cartridges, clean their copper contacts, reinstall them properly, and restart your printer. If the issue continues, update your printer’s firmware or replace the faulty cartridge.
3. Can I use non-HP ink cartridges in my HP printer?
You can, but it’s not recommended. Non-HP or refilled cartridges can cause recognition issues, poor print quality, or “cartridge not detected” errors. Always use genuine HP ink for best results.
4. How do I reset my HP printer after changing ink cartridges?
Go to your printer’s Settings > Tools > Restore Defaults, or unplug it for 2 minutes and reconnect. Then reinsert the cartridges to complete the reset process.
.jpg)